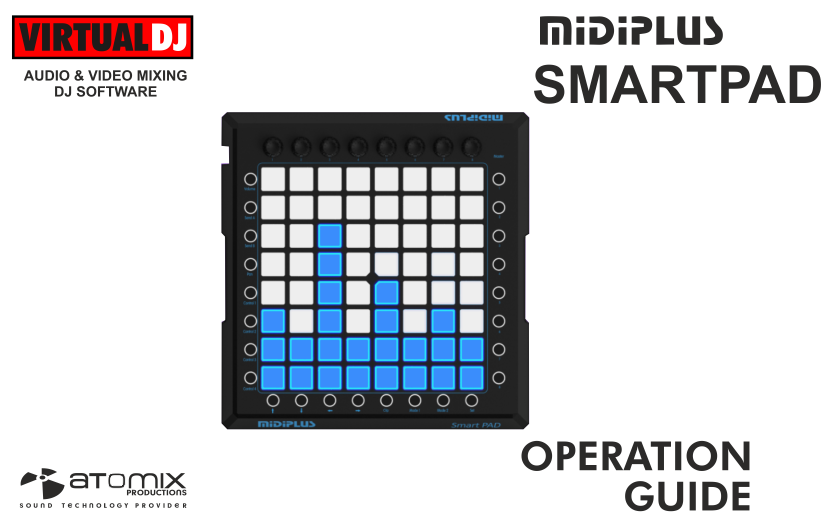
MIDIPLUS SMARTPAD
SETUP
DRIVERS
No need to install any drivers in both Windows and Mac OS computers. Simply plug the Smartpad to USB port of your computer using the provided USB cable and your operating system will auto install the necessary driver.
VirtualDJ 8 Setup
Once VirtualDJ is launched, a Connect window will appear to enter your virtualdj.com account credentials.
A Pro Infinity, a Plus Controller or a Pro Subscription License is required to fully use the Smartpad. Without any of the above Licenses, the controller will operate for 10 minutes each time you restart VirtualDJ.
https://www.virtualdj.com/buy/index.html

Press OK.
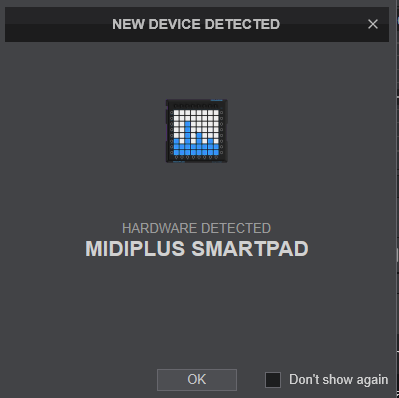
The unit is now ready to operate.
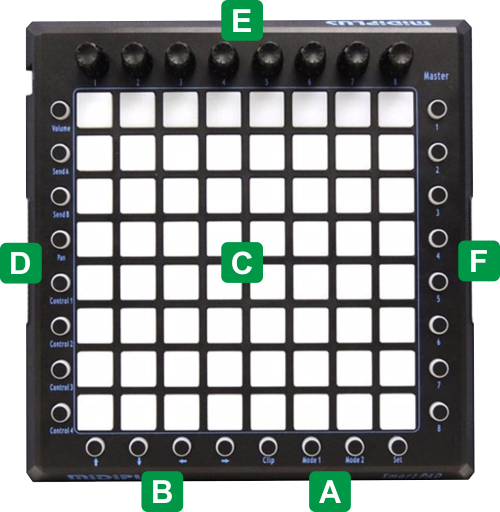
CONTROLS
The Smartpad is pre-defined to control the VirtualDJ Sampler and offers 4 hardware modes selected from the 4 bottom right buttons.
CLIP MODE (default)
Press the bottom Clip mode button to set the device to Clip mode. This mode is pre-selected each time you (usb) power-cycle the device.
In this mode the device is offering controls of the VirtualDJ Sampler.
When a Sample is loaded to a slot, the Pad will get the color of the Sample and will blink when playing. Note that due to limited offered colors of the device, the colors of the Pads may differ from the sample's color (VirtualDJ will try to match the nearest available)
MODE 1
Press the bottom Mode 1 mode button to set the device to Mode 1.
In this mode the device is offering different Midi controls than the ones in Clip mode but these are not pre-assigned to any VirtualDJ action, mostly because none of the pads and buttons offer any led control.
MODE 2
Press the bottom Mode 2 mode button to set the device to Mode 2.
In this mode the device is offering different Midi controls than the ones in Clip mode but these are not pre-assigned to any VirtualDJ action, mostly because none of the pads and buttons offer any led control.
SET MODE
Press the bottom Set mode button to set the device to Set mode.
In this mode the device is offering Volume controls on the Pads (8 vertical groups of 8 pads each), following the same hardware layer of the Rotaries.
ADVANCED SETUP
MODES
As mentioned in previous chapters, the Smartpad offers 4 hardware modes, but only the Clip mode offers Midi control on leds, and leaves Mode 1 and 2 to be customized to your needs. However, due to a firmware limitation, the status (colors) of the Leds on Clip mode are not memorized across modes, so when you return back to Clip mode, you will find all leds off.
Since the 4 mode buttons dont offer any Midi message, they cannot be mapped to refresh the leds, but can be done manually using the action refresh_controller. You can assign this action to any button on your Smartpad (e.g. Bank button 8) and press this every time you need to refresh the leds of the device.
COLORED PADS
The firmware of the Smartpad device offers 7 colors for the 64 Pads (red, blue, green, magenta, cyan, yellow and white).
Every time VirtualDJ sends a color to the Pad leds, it will try to match to the nearest available one. So keep that in mind when you set colors to your Samples. e.g. avoid using orange and red as both will be shown as red on the Smartpad.
ROTARIES
The Smartpad offers 8 endless (non-stop) rotaries at the top panel and different controls depending on the 8 hardware rotary layers, so in total 64 individual rotary controls.
When trying to assign one of those rotaries, you will notice in Key Learn of MAPPING tab of Settings that the rotary sends 2 different keys. E.g. if the 1st Volume layer is selected on Smartpad and move the 1st rotary, you will notice the keys named as .. VOL_ROTARY_1 and VOL_ROTARY_ENC_1. The _ROTARY_ key is behaving like a linear fader, and is suitable to use to assign fader-style actions such volumes, eq, effect parameters etc. On the other hand the _ROTARY_ENC_ key is suitable for other endless -1/+1 functions such as scrolling through files and folders (browser_scroll action), selecting Effects from a list etc.
It is important when customizing the rotaries to your needs to assign one or the other rotary key and not assign both, or there will be a conflict (both actions will be performed)
